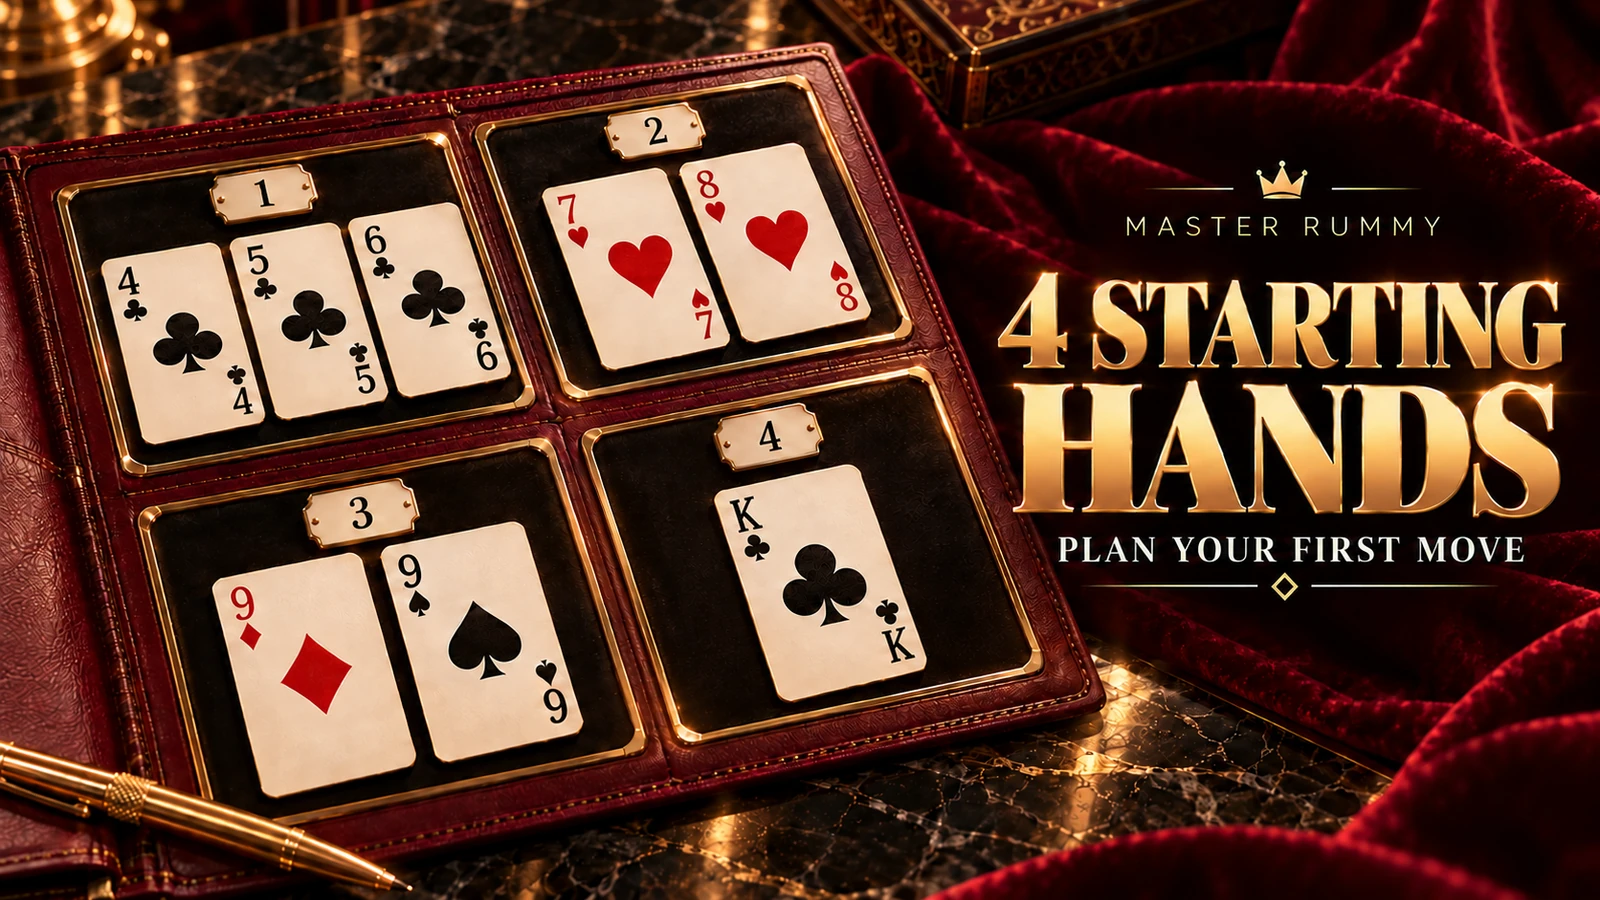
A useful first-turn plan names what is already complete, what is merely connected, and which cards are competing for the same job. Do that before guessing your next draw. These four starting hands show how the plan changes with the cards actually dealt.
The green-table diagrams are teaching illustrations, not screenshots of a live game.
Every example contains 13 cards before the first draw. None is ready to declare. The rows keep the diagrams readable; they are not a claim that every row is a finished group. The nominated wild rank is stated and absent from each hand, so all shown cards are ordinary natural cards.
We are using the standard sequence-and-set structure in the complete rules guide. This is a decision exercise, not a forecast. A possible useful card may be held elsewhere or unavailable, and no opening arrangement guarantees a result.
A three-question opening scan
- What is complete now? Name any actual pure sequence before counting hopeful connections.
- What needs one specific card? Write the rank and suit, not just “something nearby”.
- What has no clear role yet? Keep these cards separate from completed groups while considering the next real draw.
For this lesson, stop there. Do not choose an unconditional discard from a 13-card starting hand. On a normal turn you draw first, then compare the resulting 14 cards and choose what to discard. An opening plan should help that comparison, not prevent it.
Hand 1: protect the work already done
Wild rank: 8. Starting cards: 4♣ 5♣ 6♣ | 9♥ 10♥ J♥ | K♠ K♦ K♥ | 2♦ 3♦ 7♠ Q♣.
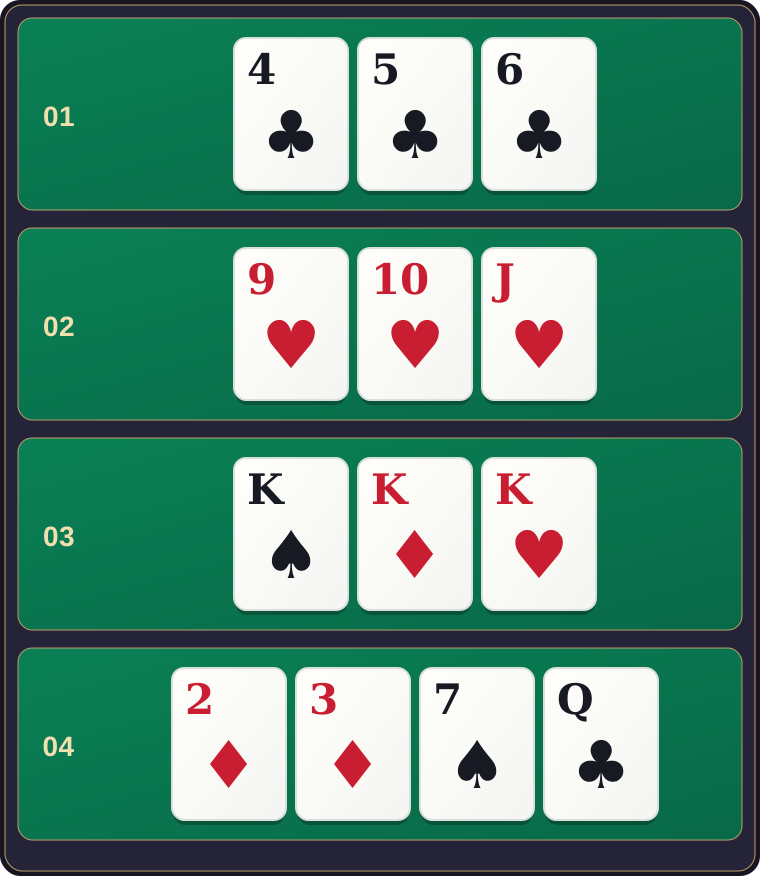
Two pure sequences are already present, and the three kings form a set. That is real progress, not a reason to declare: 2♦ 3♦ 7♠ Q♣ still need a valid arrangement. The diamond pair could become A♦ 2♦ 3♦ or 2♦ 3♦ 4♦. Both targets have a precise suit.
First-turn plan: keep the three completed groups visible. Compare the actual available draw with the diamond connection and the two currently isolated cards. Do not automatically dismantle the kings merely because they are high ranks. Their role as a completed set matters.
Common trap: calling the hand “finished except for one card” without counting what remains. There are four remaining cards, not one. A useful draw may improve that area, but the later discard and all-13 coverage still need checking.
Hand 2: several connections, no pure sequence yet
Wild rank: A. Starting cards: 3♥ 4♥ 6♥ | 7♣ 8♣ 10♣ | J♦ Q♦ 2♠ | 5♠ 9♠ K♠ 5♦.
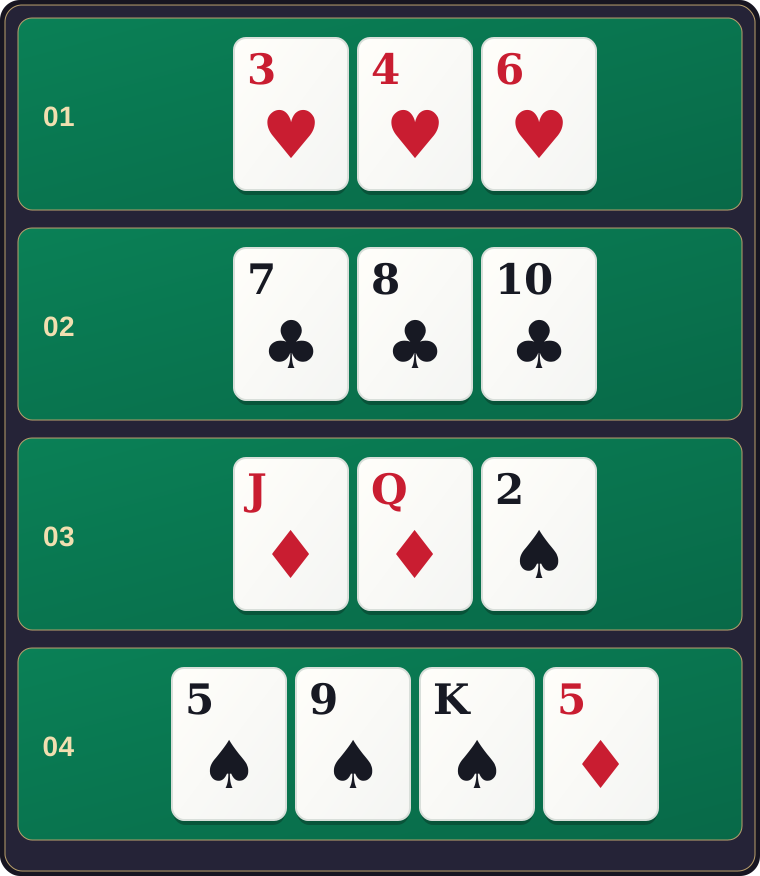
There is no completed pure sequence. The hearts would form 3♥ 4♥ 5♥ 6♥ if 5♥ were available; the clubs would form 7♣ 8♣ 9♣ 10♣ with 9♣. The diamonds J♦ Q♦ can connect through 10♦ or K♦. The two fives also offer a possible set, but two cards do not yet make one.
First-turn plan: name those routes and compare them with the visible draw option, if any. A card that completes a pure sequence has a clear role in this particular hand. That does not mean every nearby-looking card is useful: 5♦ does not fill the missing heart five, and 9♠ does not fill the club gap.
Common trap: counting three promising areas as three sequences. Until the needed cards arrive, each is still an unfinished connection. Keep the labels honest: “needs 5♥” is more informative than “almost sorted”.
Hand 3: one seven, two possible jobs
Wild rank: A. Starting cards: 5♦ 6♦ 7♦ | 7♣ 7♥ 9♣ | 10♠ J♠ Q♠ | 2♥ 3♥ K♣ 4♠.
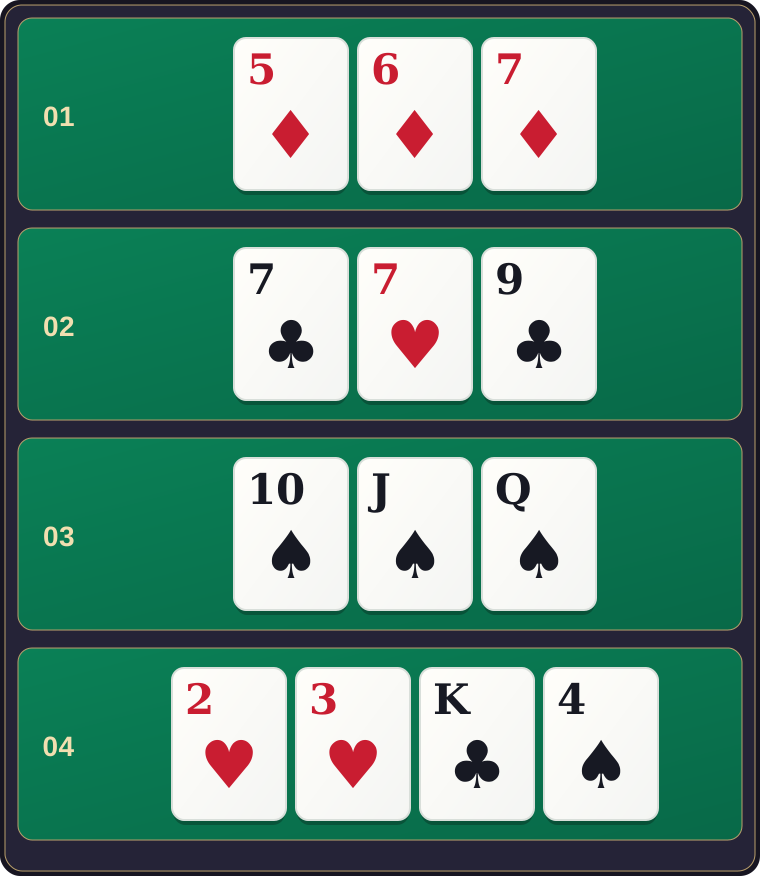
The diamonds and spades are two completed pure sequences. It is tempting to count 7♣ 7♦ 7♥ as a set as well. But 7♦ is already in the diamond sequence. Moving it leaves 5♦ 6♦ unfinished; imagining it in both places double-counts one card.
First-turn plan: compare the two arrangements honestly. Keeping the diamond run preserves two pure sequences. Moving the seven to the set leaves the spade run pure, but does not magically keep the diamond run intact. Look for actual draws that resolve the competition: 7♠ could complete a separate seven set, while 4♦ could make 4♦ 5♦ 6♦ and release 7♦ for the set.
Those are possible roles, not predictions about the next card. The heart 2♥ 3♥ is another connection worth noticing. Do not focus so hard on the seven that you stop evaluating the rest of the hand.
Common trap: judging each attractive group in isolation. Put the physical cards into one proposed layout, then another. If a card has to sit in two places at once, the plan is not yet a valid arrangement.
Hand 4: connected pairs among isolated high cards
Wild rank: 9. Starting cards: 6♠ 7♠ A♣ K♥ | 3♣ 4♣ Q♦ | 8♦ 8♥ J♠ | 2♦ 5♥ 10♣.
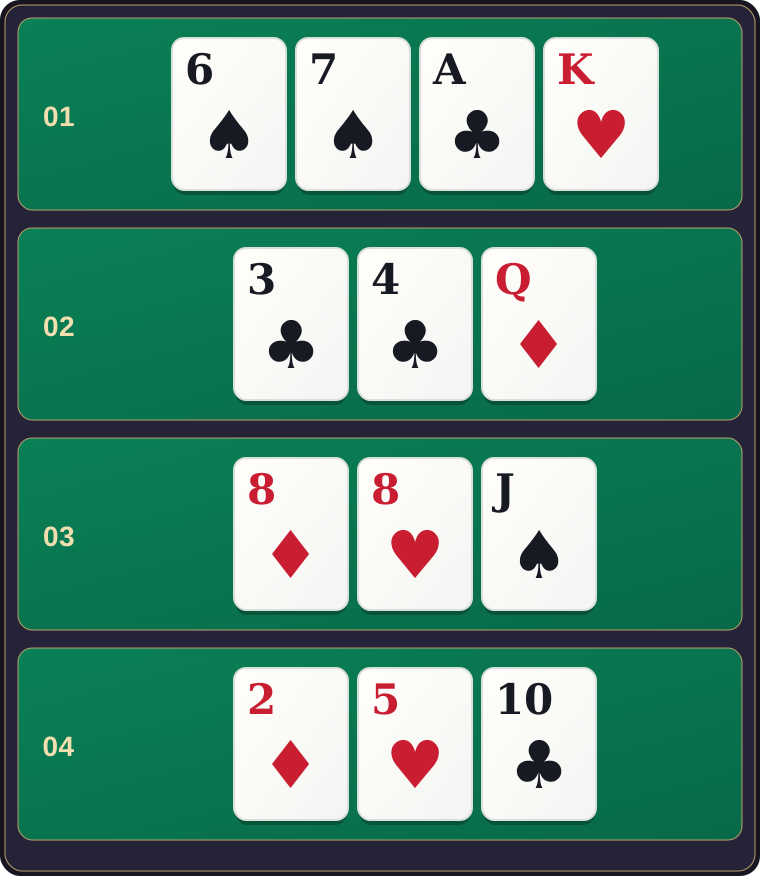
The useful starting connections are 6♠ 7♠, 3♣ 4♣ and the two eights. None is complete. Several high cards are currently isolated: A♣, K♥, Q♦, J♠ and 10♣. Notice that K♥ and Q♦ are adjacent ranks but different suits; together they do not form a sequence connection.
First-turn plan: give the connected pairs a clear place on the table, then compare the real draw against them. After drawing, consider both a card's current role and its point exposure under the table's scoring rules. There is no universal instruction to discard every high card first.
Low cards are not automatically valuable either. In this hand 2♦ and 5♥ are also isolated. A small rank without a useful role may be less helpful than a higher card that joins a genuine connection after the draw.
Common trap: sorting only by rank, then confusing the neat order with useful structure. Suit matters. So does the difference between two same-rank cards and a completed set.
Write one plan, then allow it to change
Try a one-line note for each hand: “protect completed groups”, “find a first pure sequence”, “resolve the shared seven”, or “compare connections with isolated cards”. These are priorities, not commands to keep or discard the same card regardless of what happens.
For a practical drill, lay out one hand on paper, name two specific useful draws, and explain what each would change. Then name one superficially attractive draw that would not fill the intended gap. Stop before inventing a whole lucky game.
Continue with discard decisions, 13-card planning, or the six completed-hand tests when you want to check the eventual arrangement.
Opening-hand questions
Should I keep the first arrangement for the whole game?
No. It is a working plan. Reassess after real information arrives, while keeping track of any groups you break.
Can these examples tell me a hand's chance of winning?
No. They show card relationships, not probabilities. Opponents' cards, remaining stock, discard history and table rules are not specified.
Rules used for these original examples can be compared with Pagat's Indian Rummy guide and RummyCircle's official rules. No particular Master Rummy mode, deck setting or reward is implied.